Quick Start
This guide shows the JavaScript payment process with 3DS 2.0 authentication using an integrated test web merchant
in the approval environment.
Attention: All procedures demonstrated on this page were carried out in the approval environment only to illustrate the flow of a JavaScript Payment with 3DS 2.0 authentication. None of the following screens will be used in the production environment.
What you will need
- Active registration in the Carat approval environment (obtained from our support team)
- Store registered and configured to use JavaScript payment with 3DS 2.0 authentication (obtained from our
support)
Table with different cards used for testing:
| ID | BRAND | NUMBER |
|---|---|---|
1 | Visa | 4551820000009478 |
2 | Mastercard | 5555555555555555 |
41 | Elo | 6091490000009011 |
3 | Amex | 3766001349171000 |
2 | Mastercard | 5251743209931344 Testing a card not supported by the issuer for authentications |
Table with values in cents that can be used to simulate different statuses on 3DS:
| VALUE | STATUS | DESCRIPTION |
|---|---|---|
10000 | AUY | Authentication succeeded |
10004 | AUC | Challenge Required; following the "challenge" flow. |
10001 | AUN | Not Authenticated/Account Not Verified; Transaction denied. |
Creating transaction
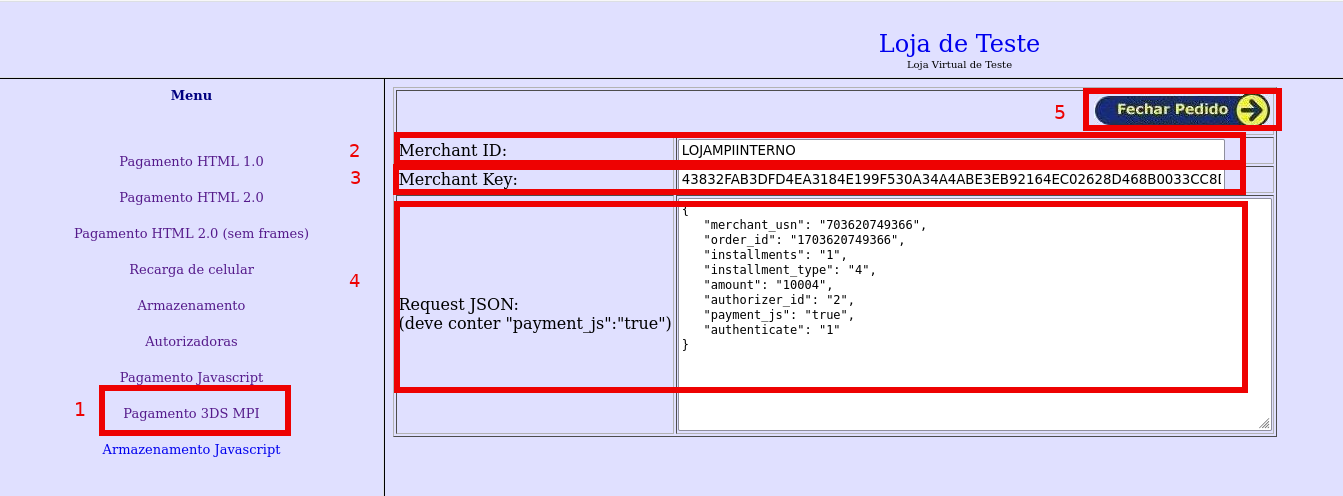
In our online store, found on the left side of the menu, a submenu titled Pagamento 3DS MPI. It's in this
submenu where we will generate the transaction, inserting the relevant information in the payload, such as the Merchant ID (your store code) and the
Merchant Key (key to your store). The other data cannot be changed, if you do not want to simulate different statuses of the
3DS 2.0 authentication. After filling in the data,
simply click the Fechar Pedido button to create the transaction.
subtitles
- 1 - 3DS MPI Payment Submenu
- 2 - Merchant ID
- 3 - Merchant Key
- 4 - Request Json
- 5 - Close Order
Payment page
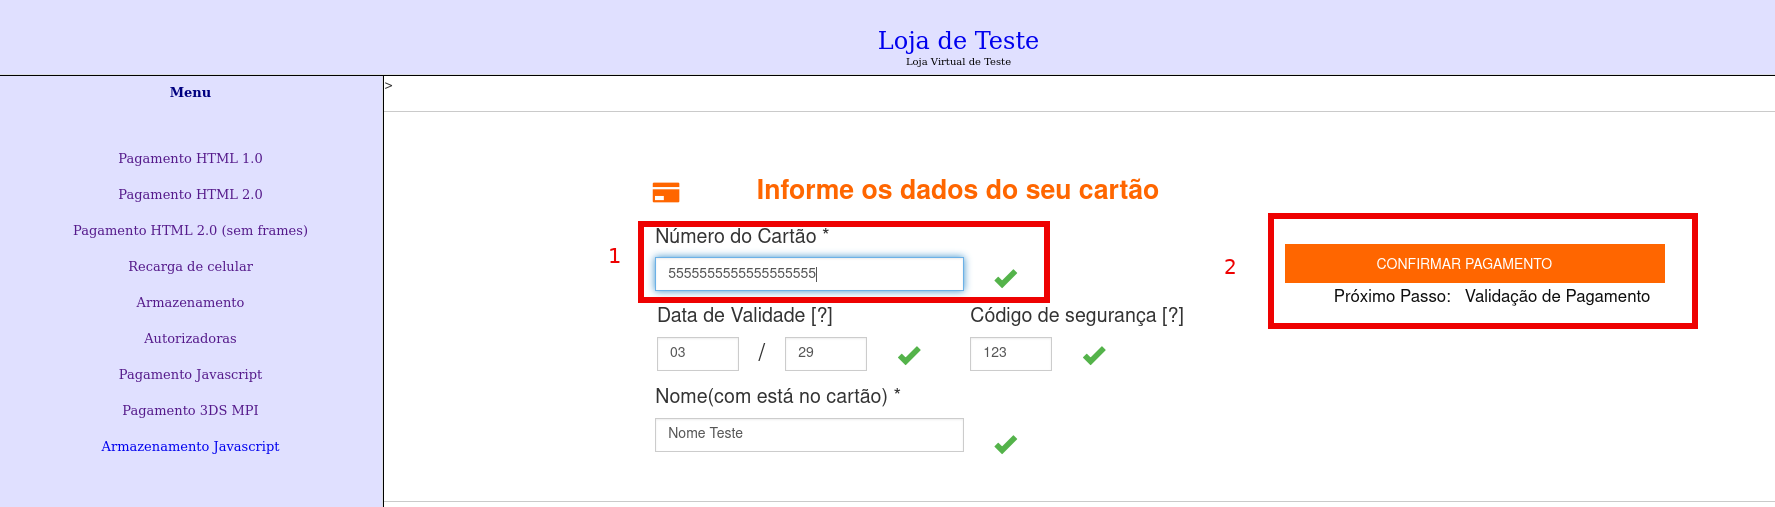
On this page, the card data will be inserted, with calls to the startThreeDs and esitefDoPayment functions
are executed. After filling out the card, the startThreeDs function is triggered to validate the card on 3DS 2.0 and
check whether the 3DS Method will be used. This entire process takes place internally, without intervention from the buyer. When
all other fields on the screen are filled in and the CONFIRMAR PAGAMENTO button is clicked, the esitefDoPayment function
is activated. This function, in turn, performs payment authentication and authorization.
subtitles
- 1 - After filling out the card, the event is triggered to call the
startThreeDsfunction - 2 - When clicking the button
CONFIRMAR PAGAMENTOthe event is triggered to call theesitefDoPaymentfunction
Challenge Flow
In certain situations, authentication with 3DS 2.0 may require a challenge to validate the cardholder's information.
card. When the buttonCONFIRMAR PAGAMENTO is pressed, the function esitefDoPayment will open a modal for carrying out
of this challenge. In our approval environment, a simulator will be displayed, offering options for the desired status of the
challenge - we will choose Status Y, indicating successful authentication - and then click on the button Enviar.
subtitle
- 1 - Combobox with challenge status options
- 2 -
Enviarbutton to complete the challenge.

Helper pages
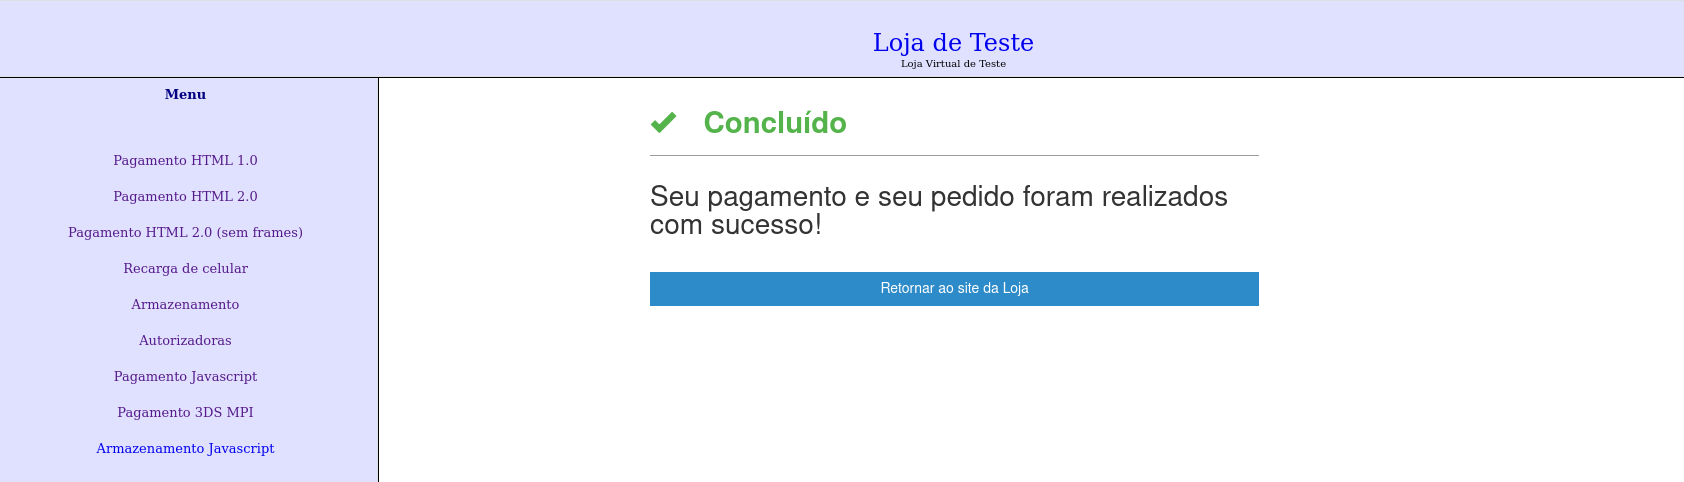
After completing the challenge or if you have not gone through the challenge flow, you will be redirected to a processing screen. This redirection is performed
by the onProcessing callback function, which was passed as a parameter in the esitefDoPayment function.
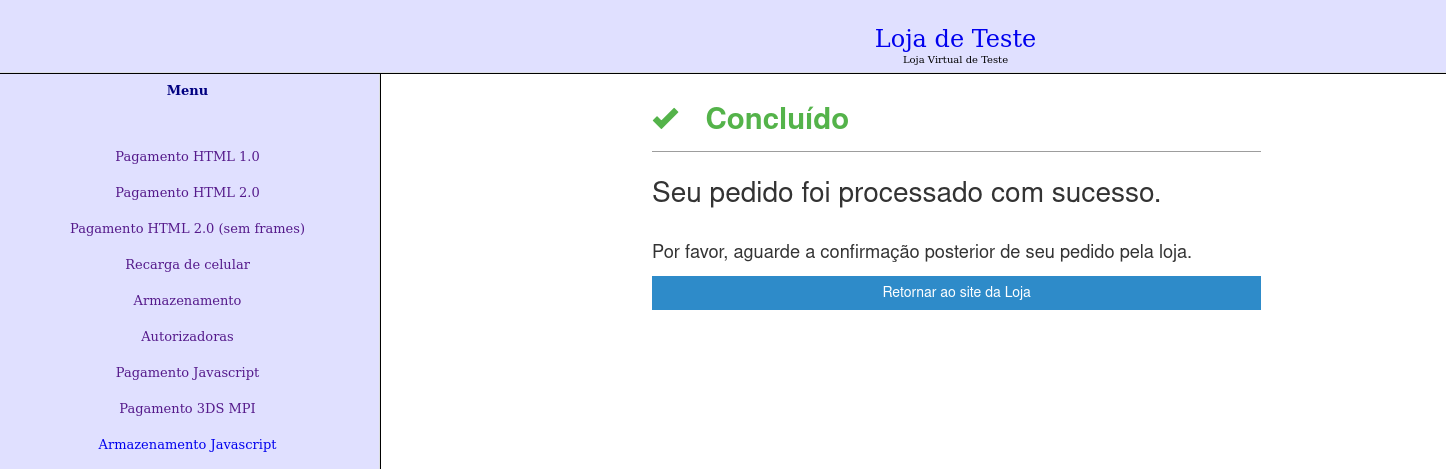
On the processing screen, there is an internal routine that performs a query to check if there has been any change in the transaction status.
If there are changes, redirection to the success screen is triggered, using the onSuccess callback function passed as a parameter
in the esitefDoPayment function.
Updated 8 months ago